Assignment 2 : The Ferrari 250 gto
Process /
The second assignment involved forming teams of 6 to work on creating a scale template for a Ferrari 250 Gto model. The model would be divided into equal portions and each team member would work towards creating their piece of the overall car shell. The initial process involved creating the 'waffle' slices from fusion 360. In hindsight, we should have experimented more with possible slice variations and materials thicknesses as we were left with some strange slices and because we had several sections the pieces proved difficult to fit as the slices became wedged together and prevented other slices from taking its position smoothly.


The car shell was taking shape, though as a result of the large number of slices we were beginning to experience fitment issues. We decided to cut some of the slices using the bandsaw to widen the slots for easier assembly. Fitment was also made easier by reducing a few slices to only incorporate the crucial pieces, this ensured that the model wasn't overly tight and was representing the correct level of detail whilst still maintaining its structural integrity.

After finishing the car shell assembly we began wrapping the whole shell in masking tape which gave the model a solid form that we could then use to create aluminium skins. The form was sectioned with a marker and as a group we discussed possible construction methods to determine which panels should join, cut or separate. The results were that the model would be split into 6 parts with each team member to choose their specific panel, I chose the left side panel which went from the front door panel to the rear fender.


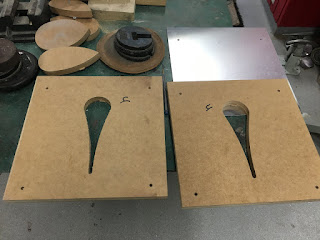
We began tracing paper templates from the car shell and using those templates to measure the aluminium sheets that were going to be cut to size. After the sheets were cut roughly to shape we gauged how each panel should start and whether pieces should be split further.


The process of shaping the left rear panel started with using the english wheel to create a soft curve to the overall piece to give it a rough shape that followed the cars contours. This was then followed by the use of the mallet to indent the window area of the panel as well as the rear fender trunk area. This proved to be quite difficult in working the panel as one piece as the forms were conflicting each other with several reverse curves and pieces leaning towards opposite directions. The panel itself could be divided into possibly 3+ individual sections to create more accurate representations of the part but I felt by doing this it would take away from the more solid feel a singular piece would offer.


Through working with the piece, the difficulties of it being one panel were becoming increasingly apparent. Shaping the piece was proving difficult as certain sections were working whilst others weren't, this was partly due to the difficulty of stabilizing the piece whilst working on the other areas which as a by product put existing sections out of place. After discussion with tutors it became clear to change the approach in shaping the piece. It would prove more effective to simply bend and really 'work' the piece with your hands to get it in place and slowly build it up with possibly the use of templates and handmade wooden tools to get more consistency in the shaping of the panel.


The final touches to the piece involved working back and forth between the hand tools and the English Wheel. Unfortunately, the wheel cutout of the fender split slightly. I really wanted to express the edge that meets the window and make that recess clear.


In finalizing the part, the piece was wet sanded with 180 grit followed by 400 and 800 graded sand paper. It then went through a single application of silver polish. Taking a look back, more consistent results may have been achieved if I had made further use of the English Wheel at the start. If the curves were really established before the mallet work it may have proved to be more manageable as one piece and may have prevented the split that occurred in the rear fender.


End Result
In finalizing the model, we went through a few stages of polishing each piece and worked on finessing the parts together so that they fitted more consistently.


Comments
Post a Comment